SMS Launcher
SMS Launcher is a native PC port of Super Mario Sunshine for Windows, macOS, and Linux that guides you through setup and provides a one-click play button.
- Type: PC port
- Game: Super Mario Sunshine
- Runs on Windows, Linux and macOS
- By chasem-dev
- Latest release v0.1.53, 2026-10-08
- Source: https://github.com/chasem-dev/sms-launcher
README

SMS Launcher
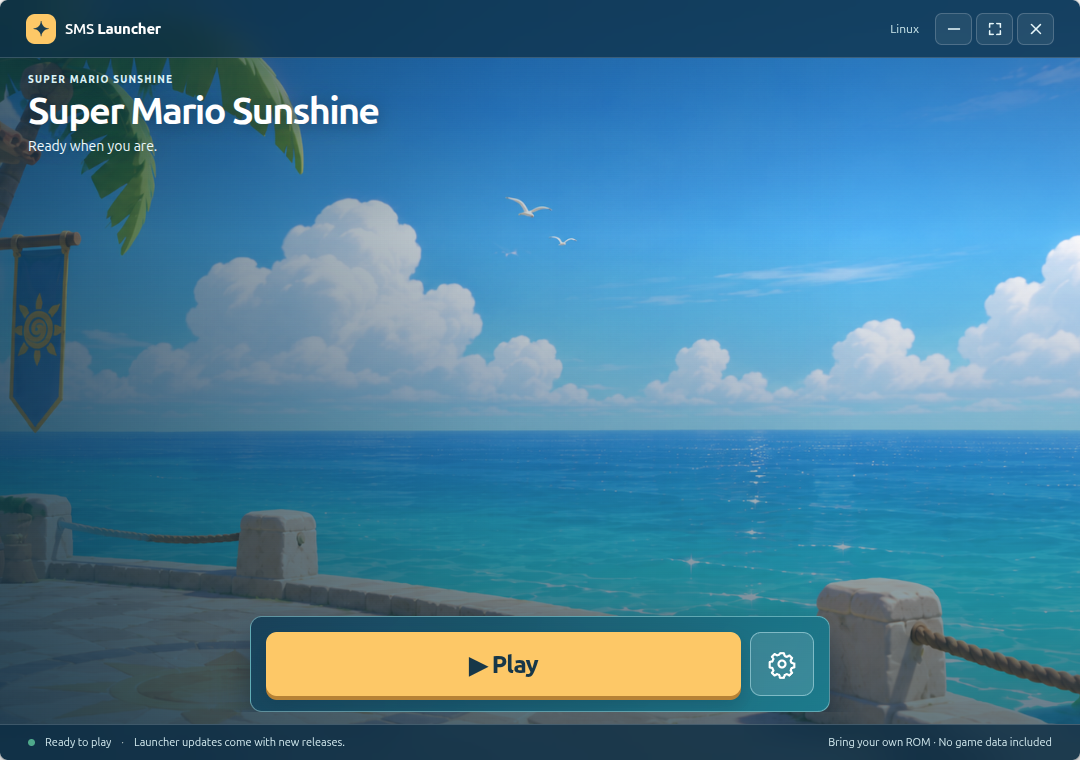
Set up and play Super Mario Sunshine on Windows, macOS, and Linux. SMS Launcher guides you through setup, downloads the tools it needs, and gives you one big Play button when you're ready.
Bring your own ROM is required. You need a disc image made from your own supported Super Mario Sunshine disc. The launcher does not include a game or disc image.
Download
Download SMS Launcher from the latest release
Choose the launcher file for your computer:
| Your computer | Download |
|---|---|
| Windows | The .exe installer |
| Mac — Intel or Apple Silicon | SMS-Launcher-<version>-mac-universal.dmg |
| Linux | The .AppImage |
The launcher requires a 64-bit computer and an internet connection for setup. Required setup tools download automatically.
Install
Windows
Open the .exe installer and follow the steps, then open SMS Launcher.
Mac
- Double-click the
.dmg. - Drag SMS Launcher.app onto Applications in the window that opens.
- Eject the disk image, then open SMS Launcher from Applications.
Use the DMG for the usual drag-and-drop installation. If you download the ZIP instead, move the extracted app into Applications before opening it.
Linux
Download the .AppImage, allow it to run as a program in your file manager's permissions settings, then open it.
Set up your game
The launcher walks you through three steps:
- Download setup files. Use the suggested location, or choose a different folder before downloading.
- Choose disc image. Select a copy of your own original North American Super Mario Sunshine disc — GMSE01, revision 0. Supported files are
.iso,.gcm, and Dolphin.ciso. - Begin setup. The launcher downloads HD textures and prepares your game on your computer. This first setup can take a while.
On Mac, setup may ask you to install Apple's Command Line Tools and, on Apple Silicon, Rosetta. Follow Mac setup help in the launcher.
The progress bar shows what's happening. View build log opens more detail; closing that view keeps setup running.
When setup finishes, press Play.
Play and change settings
After setup, the main screen is just Play and the Settings cog beside it. The game opens in a centered, resizable window.
Open Settings to change screen format, smoothness, picture sharpness, and HD textures. Changes take effect the next time you start the game.
On Windows, macOS, and Linux, the defaults are 64-bit, HD textures on, Sharpest (4×) picture sharpness, icons at the screen edges, and 60 fps gameplay. Existing users keep their saved settings.
Settings → Gameplay → Frame rate offers 30 fps (GameCube native), 60 fps (default), and 120 fps (optional). The previous 60 fps switch migrates to 30 or 60 without changing your saved preference. 120 fps stays available on every display; it needs more CPU/GPU performance, and a display running at 120 Hz or faster shows its full benefit. Logos, menus, and movies stay at 30 fps.
Turn on Settings → Visuals → Full screen to have the game fill your display on its next launch.
Settings → Gameplay → Invert camera X / Y flip the C-stick camera left/right and up/down. X is inverted by default and Y is not.
Settings → Sound → Volume sets the game's master volume, from 0 to 100% (full by default). It takes effect on the next launch.
- Game files lets you change the setup folder or choose a different disc file.
- Manage game has updates, rebuilding, save backups, and space cleanup.
- Controls sets the keyboard keys for each button: Change uses one key, Add adds another, Reset goes back to the default. Controllers need no setup.
- Versions shows your launcher, game, and setup tool versions for support.
Windows and Linux offer both 64-bit and 32-bit game builds. Keep the default 64-bit choice unless you need 32-bit. Mac game builds are 64-bit.
HD textures
HD textures are on by default for first-time setup. In Sunshine mode, this also installs all 21 enhanced cutscenes at 3× resolution, preserving their timing and original audio. Textures use about 1 GB to download and 3 GB installed; the movie patches add about 5.7 GB to download and 5.8 GB installed. Movie setup needs about 7.8 GB free, plus room for textures if needed. You can turn HD visuals off in Settings → Visuals. Existing users keep their saved choice.
If HD setup is incomplete, choose Finish HD setup to download and prepare the missing files. Previously installed textures and movies are reused. The launcher shows download progress and checks all movies before activating the pack. Failed or cancelled setup keeps the previous pack. Your original disc and saves stay intact. Eclipse keeps its own movies.
Updates
When a game update is ready, the main button becomes Update & play. Choose Skip update & play beside it to launch your installed version without downloading or rebuilding. Your current game stays available until the new setup succeeds.
If optional HD downloads are unfinished, Play installed version also lets you play now using the packs already installed. Missing HD packs stay off for that launch; your visual preferences remain saved for later setup.
Launcher updates download automatically when Update automatically is enabled and install when you quit. If automatic updates aren't available for your installation, download and install the latest launcher from the releases page.
To manage updates yourself, turn off Update automatically in Settings → Manage game. Use Update game there when you're ready.
Saved games and backups
The launcher keeps your save location when you update or rebuild the game. It makes dated backups before and after playing, and before game updates or cleanup.
In Settings → Manage game → Saved games, you can:
- Import a Dolphin save: drop a
.gcifile into the Saved games panel, or choose Choose .gci file. Confirm the import, then start the game. - Back up saves whenever you want an extra copy.
- Open backup folder to find your backups.
- Choose an earlier backup and select Restore backup. Your current saves are backed up before restoring.
Backups are stored in SMS Launcher Backups in your home folder, separate from the launcher installation and game build folders. Copy that folder to another drive or cloud storage for extra protection.
Export your North American Super Mario Sunshine save (GMSE01, super_mario_sunshine) from Dolphin's Memory Card Manager as a .gci file. The importer transfers the entire save, including all three slots. It installs the unchanged save data and the card metadata into the save folder shown in the launcher, including custom locations, on Windows, macOS, and Linux. A fresh card does not need to be created in-game first. Other games, regions, raw memory cards, and .sav/.gcs files are not supported.
The launcher asks before importing, warns if save block checksums fail, and makes a verified backup of your existing card before writing. A failed import restores the files it replaced. Import is disabled while the game or another launcher task is running. The source .gci is never changed or uploaded. Restore a Before Dolphin import backup to recover previous progress.
The conversion follows the GCI header/payload approach demonstrated by the community GCI-to-DAT converter, with metadata and index creation for the port's card backend. Header fields follow Dolphin's GCI directory entry format.
Optional: Super Mario Eclipse
Super Mario Eclipse is a fan-made expansion available in Settings. Enable it and choose Install Eclipse mod, then finish any setup the launcher requests. Turn it off to return to the original game.
Eclipse needs a full, unmodified North American ISO; compressed CISO files won't work for its patch. Eclipse has been verified on Linux and is experimental on Windows and Mac.
Need help?
- Setup or a download failed: open View activity on the error message to see what happened, then try setup again. A failed HD download leaves Finish HD setup available to retry.
- A game update failed: use Play installed version in Manage game. After a successful update, Play previous version is also available there.
- Mac says the launcher is on a read-only volume: quit the launcher, move SMS Launcher.app into Applications, eject the DMG, and reopen it from Applications.
- Need to free up space: use See removable files in Manage game, then Free up space. The launcher keeps your disc file and saved games.
For developers
SMS Launcher is an Electron frontend for sms-pc-port. Game preparation stays on the user's computer and requires their own disc image.
Run locally
Install Node.js 22.12 or newer and npm, then:
git clone https://github.com/chasem-dev/sms-launcher.git
cd sms-launcher
npm ci
npm start
For development alongside the port, use sibling folders:
workspace/
├── sms-port/
└── sms-launcher/
Development runs detect a neighboring sms-port/ automatically. Packaged installs use the launcher's data folder by default. Existing setup folders can be selected in Settings → Game files.
Test and package
npm test
npm run dist
To make a universal Mac package on macOS:
npm run dist -- --mac --universal
Packages contain the launcher. Game source, disc images, optional mods, compiled games, and saves are not bundled.
The separate Smoke test build tools workflow downloads checksum-verified tool archives and compiles the exact source in src/game-release.json without a ROM. It checks both 32-bit and 64-bit games on Windows and Linux, and 64-bit games on Intel and Apple Silicon Mac hosts. These checks are a required release gate; they do not publish game binaries.
Build tools
The launcher checks available tools and downloads prepared archives when needed. Downloads are checksum-verified and stay in its private data folder. Users do not need to install Git, Homebrew, or MSYS2 themselves.
| Host | Prepared tools |
|---|---|
| Linux x64 | Git, CMake, Python, GCC, SDL2, EGL, Make, patch, binutils, 7-Zip, and an x64-host 32-bit cross compiler with its SDK and graphics libraries |
| Windows x64 | A prepared MSYS2 tree with 64-bit helper programs and compilers for both 32-bit and 64-bit games |
| Mac Intel / Apple Silicon | Native LLVM, CMake, Python, Git, Make, patch, and 7-Zip; Apple's Command Line Tools and Rosetta are installed separately when required |
Tool archives are separate release assets, with source archives and package notices. Matching versions are reused. Changed archives install into separate folders, preserving tools needed by earlier game builds. Each game build records its tool location.
See build tool publishing for archive preparation and publishing.
Versions and releases
| Component | Version location | When it changes |
|---|---|---|
| Launcher | package.json | Launcher behavior, UI, or selecting a new game/tools release |
| Game source | src/game-release.json | A tested port commit and its exact decomp commit |
| Build tools | Platform entries in src/tool-assets.json and src/mac-tool-assets.json | When that OS or architecture needs different tools |
Source or tool changes require a game rebuild. Visual preferences and launcher-only updates reuse the existing game. The launcher selects compatible versions; users don't manage branches or commits.
Launcher release: run npm version patch --no-git-tag-version, commit package.json and package-lock.json, and push to main. The release workflow creates the tag and draft, verifies the game with the published tools, builds the Linux AppImage, universal Mac DMG/ZIP, and Windows installer, then publishes after all checks pass. Documentation-only changes don't need a version bump.
Game update:
- Push a complete port revision, including its decomp gitlink, to the branch selected in
src/game-release.json— currentlymain. - Run
npm run update:gameornpm run update:game -- <port-commit>. It records exact source revisions, assigns a dated game version, and bumps the launcher version. Selecting the same revision makes no changes. - Review and commit
src/game-release.json,package.json, andpackage-lock.json, then push tomainto run the release gate.
Tool update: publish the affected OS or Mac architecture through the separate tool workflow, adopt its generated manifest entry with the new immutable URL and checksum, and bump the launcher. Preserve existing archives and hashes. See the toolset workflow.
Launcher updates and Mac signing
Release packages embed their GitHub update feed, check on startup and every 30 minutes, and install downloaded updates on quit. The Mac ZIP is required by the automatic updater; the DMG is the recommended user installation.
macOS automatic updates require signed builds using the MAC_CSC_LINK and MAC_CSC_KEY_PASSWORD secrets. Unsigned builds remain available for manual installation. Windows signing uses WINDOWS_CSC_LINK and WINDOWS_CSC_KEY_PASSWORD. SMS_LAUNCHER_UPDATE_URL can override the embedded feed with an HTTPS generic feed. Local packages without a feed cannot fetch new launcher releases automatically.
Save storage and recovery
The launcher honors SMS_SAVE_DIR or save_dir in the port's settings.txt and displays the resolved path. Verified backups live outside the launcher and port folders in ~/SMS Launcher Backups.
Source updates build in separate folders and switch preferences only after success. Rebuilds preserve the previous binary and metadata; a recovery journal restores interrupted builds on the next start. Cleanup refuses custom save folders inside removable build output. Restore verifies the backup and saves current progress first. Disc images and patched discs are not included in save backups. A single-instance lock prevents overlapping updates and save operations.
HD cutscene integration
The HD textures switch controls both textures and Sunshine's complete movie pack. Movie patches are reconstructed using the player's own North American Sunshine disc image (GMSE01); Python is needed for installation, but FFmpeg and an AI runtime are not needed to install or play them. The catalog pins every original movie, downloaded patch and reconstructed movie by SHA-256. The installed pack carries over across game updates. See the port's HD cutscene guide for manual and offline installation.